Newsletters
 |
Sawmill Newsletter October 15, 2007 |
Welcome to the Sawmill Newsletter!
You’re receiving this newsletter because during the downloading or purchase of Sawmill, you checked the box to join our mailing list. If you wish to be removed from this list, please send an email, with the subject line of “UNSUBSCRIBE” to newsletter@sawmill.net .
News
Sawmill 7.2.10 shipped on August 4, 2007. This is a minor "bug fix" release, and it is free to existing Sawmill 7 users. It is not a critical update, but it does fix a number of bugs, adds support for many new log formats, and adds a few small features. It is recommended for anyone who is experiencing problems with Sawmill 7.2.9 or earlier. You can download it from http://sawmill.net/download.html .
This issue of the Sawmill Newsletter describes techniques for improving the performance of database updates.
Get the Most out of Sawmill with Professional Services
Looking to get more out of your statistics from Sawmill? Running short on time, but need the information now to make critical business decisions? Our Professional Service Experts are available for just this situation and many others. We will assist in the initial installation of Sawmill using best practices; work with you to integrate and configure Sawmill to generate reports in the shortest possible time. We will tailor Sawmill to your environment, create a customized solution, be sensitive to your requirements and stay focused on what your business needs are. We will show you areas of Sawmill you may not even be aware of, demonstrating these methods will provide you with many streamlined methods to get you the information more quickly. Often you'll find that Sawmill's deep analysis can even provide you with information you've been after but never knew how to reach, or possibly never realized was readily available in reports. Sawmill is an extremely powerful tool for your business, and most users only exercise a fraction of this power. That's where our experts really can make the difference. Our Sawmill experts have many years of experience with Sawmill and with a large cross section of devices and business sectors. Our promise is to very quickly come up with a cost effective solution that fits your business, and greatly expand your ROI with only a few hours of fee based Sawmill Professional Services. For more information, a quote, or to speak directly with a Professional services expert contact consulting@flowerfire.com.
Tips & Techniques: Creating Custom Reports
Sawmill creates a collection of "standard" reports when you create a profile, including the Overview, one report per non-aggregating database field, the Log Detail Report, session reports (if available), and Log Detail. But there is nothing "special" or "hard-coded" about these reports; they are just the default reports included in the profile, and you can create similar reports yourself, or edit or remove these default reports. This newsletter takes you through an example of creating a custom report.
Custom reports are available only in Sawmill Professional and Sawmill Enterprise; reports cannot be customized through the web interface in Sawmill Lite.
To start creating a custom report, start with a profile (create one if you don't have one, using Create Profile in the Admin page). Then:
1. Go to the Config section of the profile, either by clicking Show Config next to the profile, in the profiles list, or by clicking Config in the reports interface of the profile.
2. Then choose Manage Reports from the left menu.
3. Click Reports/Reports Editor.
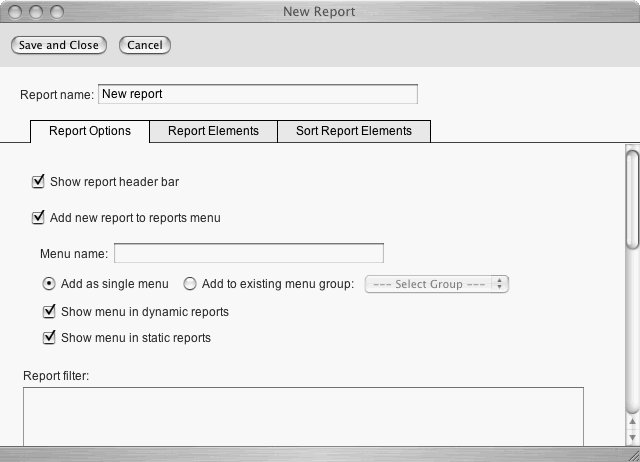
4. Click New Report, in the upper-right corner of the reports list. The Report Editor appears:
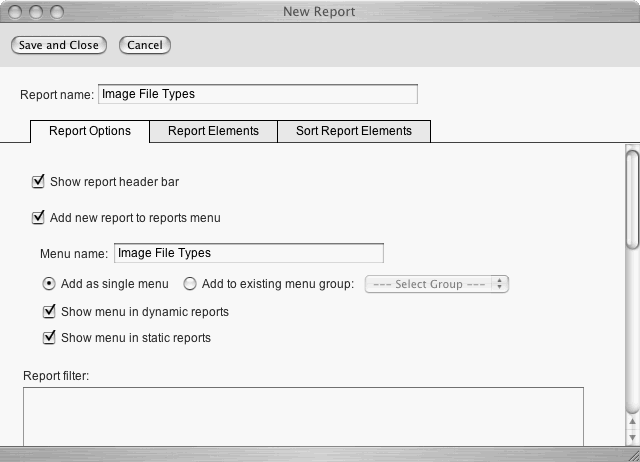
5. Choose a name for a report. In this case, we'll call this "Image File Types," by typing that in the Report Name field. We'd also like to have this report be accessible through the Reports Menu (the menu at the left of the Reports interface), so we leave Add new report to reports menu checked, and give it a name for the Reports Menu (in this case, the same name: "Image File Types"):
6. Each report contains one or more report elements. A report element is generally a table of data, with associated graphs. We will create a report with one element (the Single-page summary is an example of a report with multiple elements). To do this, click the Report Elements tab:
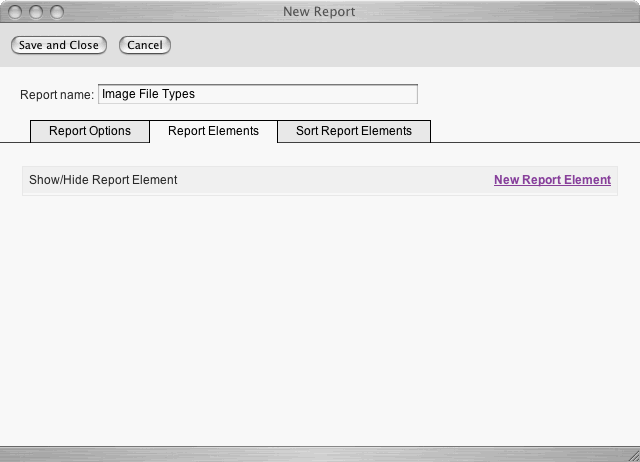
7. Then, click New Report Element at the right, to create a new report element, and to begin editing it:

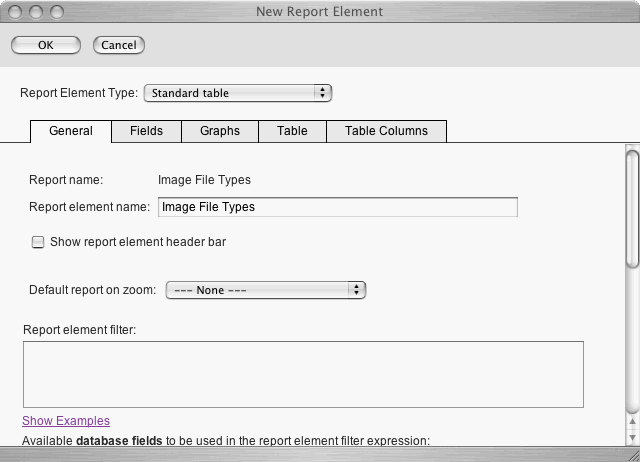
8. The Type is Overview by default, but we don't want an Overview--we want a table report (specifically, a table of File Types). So choose "Standard table" as the Report Element Type. Then enter a Report element name ("Image File Types" again). This name doesn't usually appear anywhere, but if you have multiple elements, or if you explicitly turn on the name, it will appear in the reports:
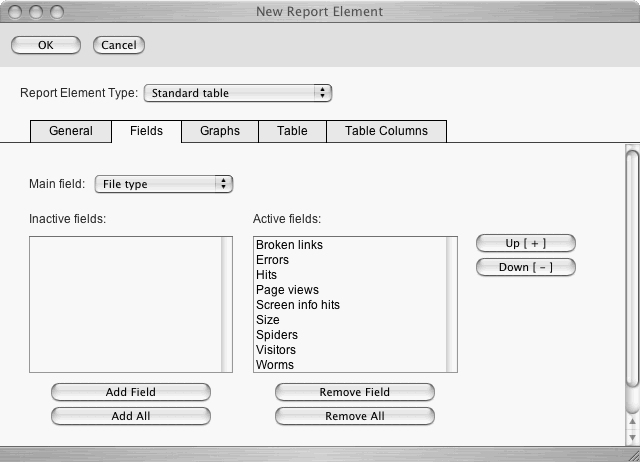
9. Now we have a table report element, but we have to tell Sawmill what fields will be in the table. This will be a table of file types, So click the Fields tab, and select "File type" from the Main field menu, and leave all the numerical fields intact:
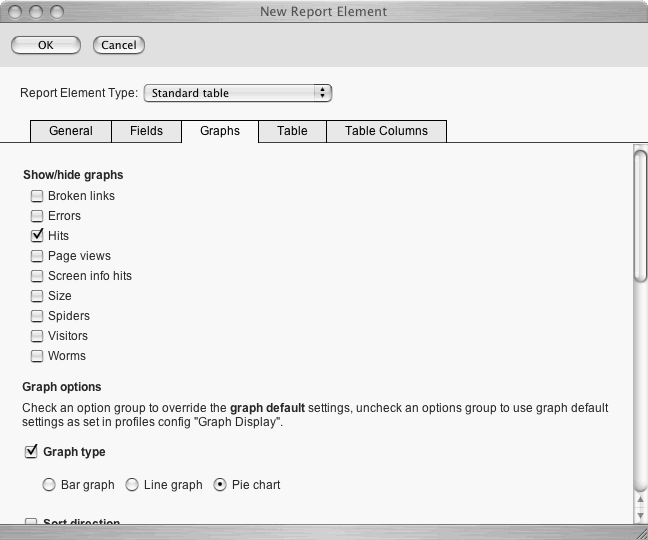
10. We could stop now, and we have re-created the File Types report, with a different name. But we'd also like to show only image file types, and we'd like a pie chart of them. First, add the pie, by clicking the Graphs tab, clicking one of the numerical fields (Hits in this example), and making it a pie by clicking Graph type and Pie chart):
11. We're done with the Report Element, so click OK to close the Report Element editor.
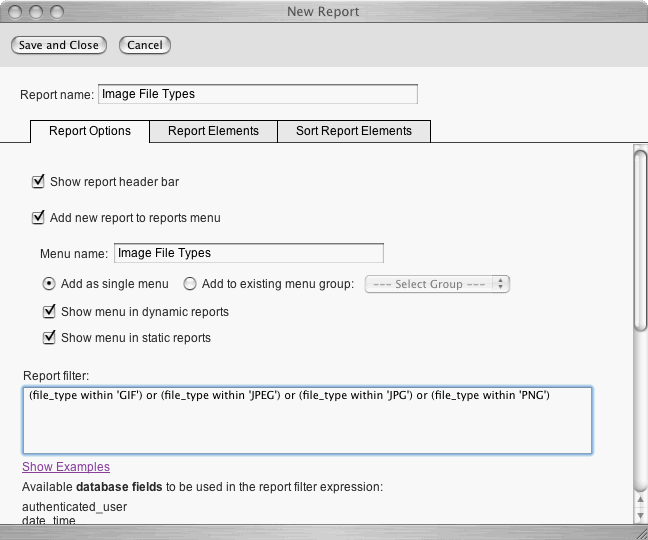
12. At this point, if we stopped, the report would be a File Types report with a pie chart. But we still want to add a filter, so click back to Report Options tab in the Report Editor, and enter a report filter expression to select only the image file types (GIF and JPEG). The Salang expression to do this is "(file_type within 'GIF') or (file_type within 'JPEG') or (file_type within 'JPG') or (file_type within 'PNG')", so we enter that in the Report filter field:
13. We're done! Click Save and Close to close the Report Editor, and then click Reports in the upper left to return to the Reports interface. At the bottom of the left menu, you will see our custom report, Image File Types; click that to see the custom report:
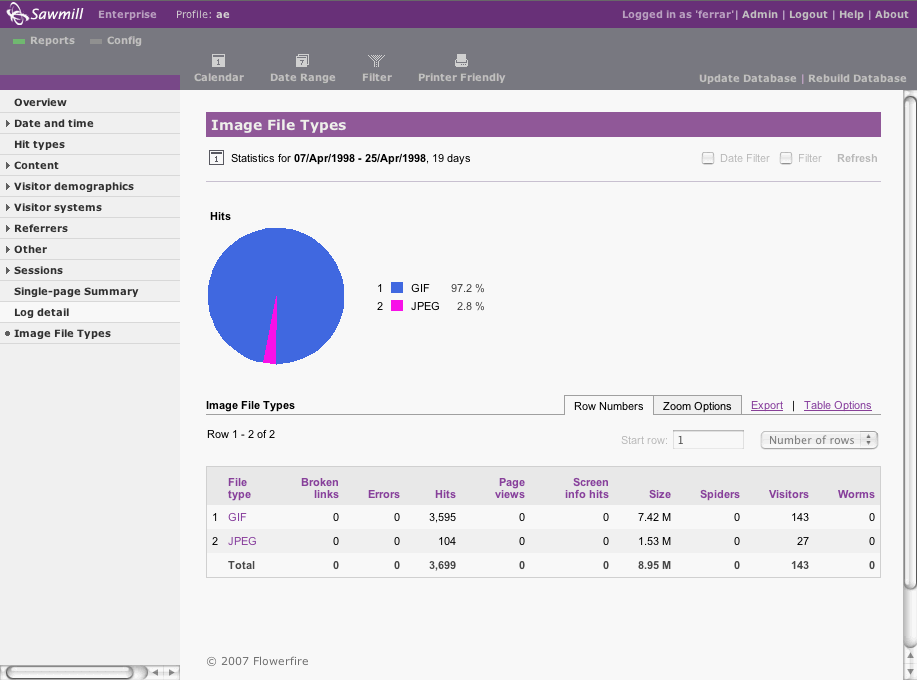
This shows all hits on GIF, JPEG, JPG, and PNG images in this dataset; this particular dataset had no JPG or PNG hits, so it shows just GIF and JPG lines.
Advanced Topics
This is just a small slice of what the Reports Editor can do.
* In this example, we created a standard table report, but the report editor can also create "table with subtable" reports, where each row contains an indented table, breaking down the events for that row by a second field (e.g., the "Search Engines by Search Phrases" report, in a standard web log profile). The Reports Editor can also create other specialized types of reports, like Sessions Overview, Log Detail, Session Paths, and more.
* In this example, we created a single pie chart, but the Reports Editor can also create bar charts or line graphs. The charts also have many options, controlling their size, colors, legends, and more.
* In this example, we created a report with a single report element; in the Report Editor, you can create reports with many report elements, like the standard Single-page Summary.
* In this example, we just left the report at the bottom of the Reports Menu, but it can be moved to the middle or the top, put into a new or existing group, or hidden entirely, using the Reports Menu Editor (click Edit Reports Menu at the top right of the Reports/Reports Menu page).
Questions or suggestions? Contact support@sawmill.net. If would you like a Sawmill Professional Services expert to implement this, or another customization, contact consulting@sawmill.net.
[Article revision v1.0]
[ClientID: ]